An even faster method for selecting tools is the marking menus. Marking menus generally hold fewer tools than a shelf, but are much faster since you can use quick gestures to choose tools. With practice, selecting tools with marking menus becomes almost instantaneous.
To choose common tools with marking menus
 and
and  (Windows) or and
  (Mac) keys.
 .
.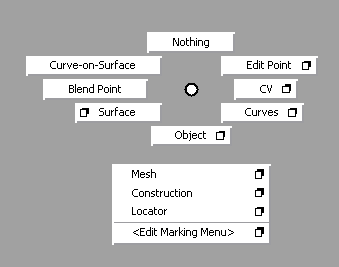
The left mouse button marking menu appears at the location of the mouse pointer.
held down and drag down
until the Pick > Object  box is highlighted.
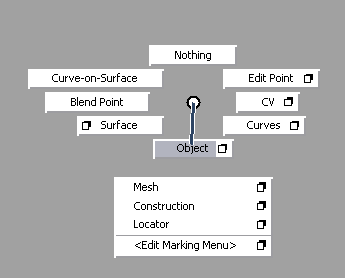
A thick black line shows the direction of the mouse pointer.
The Pick > Object tool is now the current
tool.
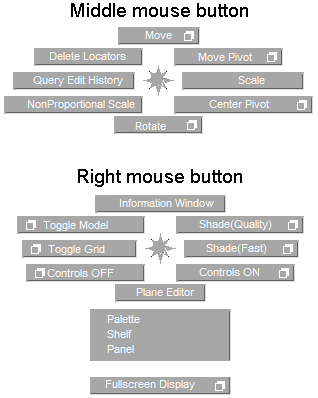
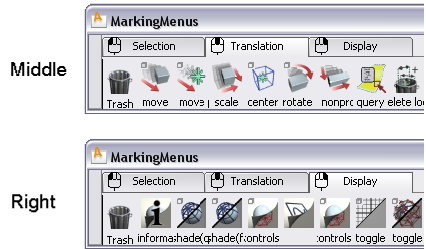
and (Windows) or and (Mac) with the middle, then
with the right mouse buttons to see the other marking menus.
Each mouse button has a separate marking menu.
Once you have learned which direction corresponds to which tool in a marking menu, you can use a quick gesture to choose the tool.
and (Windows) or and (Mac) keys, then drag up
and release the mouse button quickly.
The black line shows the direction, but the menu is not drawn.
When you release the mouse button, the marking menu flashes the name of the selected tool on the screen.
You have just selected Pick > Nothing  .
.
Use this method to choose tools even faster once you have mastered the positions of the tools on the menu.
Learn which tools are on the marking menus, and use the marking menus whenever you need to choose one of those tools. The more you use them, the faster you will become, until you can choose tools with quick gestures.
To customize a marking menu with common tools
The MarkingMenus shelf window appears.
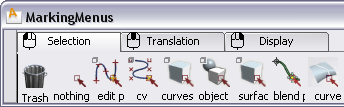
This is a special shelf window. The tools and menu items on the different tabs appear in corresponding marking menus.
The procedure to modify the content of marking menus is similar to the one for modifying shelves that you learned earlier.
Here you will make a small modification to the Selection marking menu shelf.
 tool.
tool.
 on the icon and drag it
to the marking menu shelf, to the location shown in the image below.
on the icon and drag it
to the marking menu shelf, to the location shown in the image below.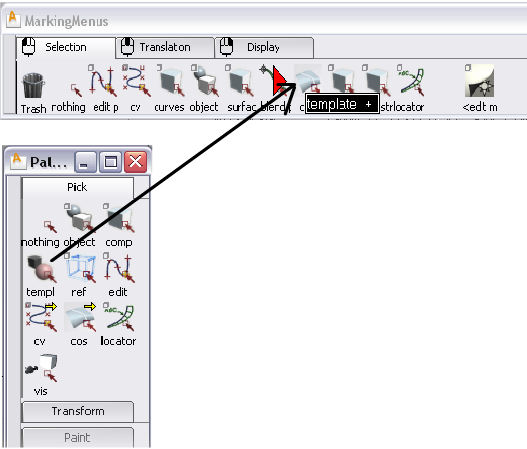

You now have a tool on the marking menu to pick templated geometry.
and (Windows) or and (Mac) keys and press the to show the marking menu
again.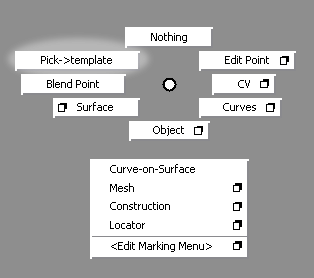
The tool you just added is called Pick > Template in the marking menu. Change the name to something more concise.
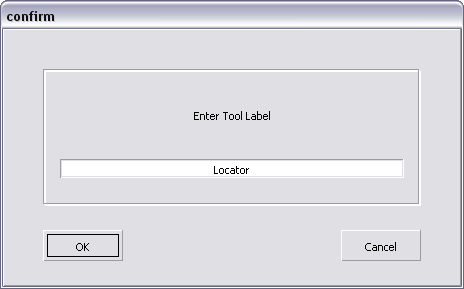
(Windows) or (Mac) key and double-click
the Pick Template tool in the
shelf.
A dialog box appears.

You now know how to customize the marking menus. In later lessons, you will load pre-made marking menus with common surfacing tools.


