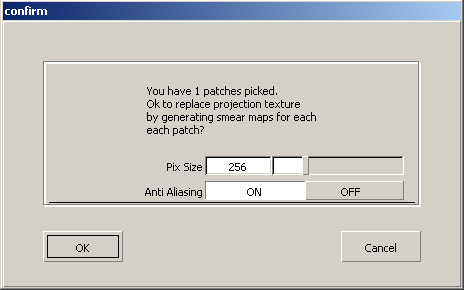
The default Image Size is 256 pixels square. Image files are created and sized so that the Image Size corresponds to the longest dimension of the largest selected surface. If more than one surface is selected, the other image files are proportionally smaller. The valid range is 8 - 1024 pixels.

The progress bar at the far right indicates the status of the current image creation.
Each selected surface now has its own Smear Map which has all of the same properties as the original Projection texture.
 during the Convert
to Smear operation, the files created up to that point
will be correct but will not necessarily be assigned. Even if you
delete the shader used by Convert to Smear,
the image files still exist in a directory with the name of the
original shader in the current pix directory. If you do a second Convert
to Smear operation using the same shader and objects,
the previously created files are overwritten without warning.
To display the texture
on the shader swatch, copy any image file name from the Per Object
Images list to the default Image field
(click in the Object list to highlight the image
file name, then click in the default Image field
with the  to paste).
Convert to Smear has the following limitations:
There are two ways to create a Projection texture: using the Multi-lister or using the Projection tools.
There are eight different
types of Projection tools, representing
the eight different types of projections. See Projection Texture
Parameters in Render > Multi-lister  for a description of each
projection type.