The Diagnostic Shading section of the Modeling control panel has been renamed to Shading and four new environment and shading preset buttons have been added to it—three Visual State buttons and one File State button. Click these buttons to turn on hardware shading and shade the model using the environment and shading settings associated with each button.
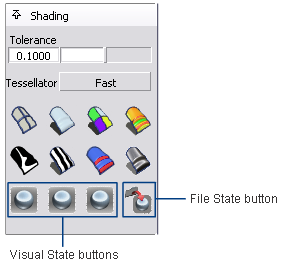
You can change the settings associated with each of these buttons.
The settings for Visual
State buttons 1, 2 and 3  are stored with your user
preferences.
are stored with your user
preferences.
The settings for the
last active environment are stored with the fourth button, the File State  button, when you save your
file. The settings are saved with the file, so anyone opening the
file can set the environment to your last active environment using
the File State button.
button, when you save your
file. The settings are saved with the file, so anyone opening the
file can set the environment to your last active environment using
the File State button.
To turn on hardware shading and apply a preset enviroment
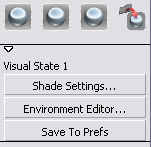
To change settings for Visual State buttons 1 - 3
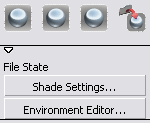
To change settings for the File State button
To turn off hardware shading


