The first time you run Alias, you’ll be presented with a workflow selection.
Choose the Paint workflow if you want to work solely within a 2D environment. You can click the Do not show again check box so this window won’t appear every time you launch Alias.
If you have chosen a workflow setting and checked Do not show again, you can change the default workflow by choosing the workflow you want from Preferences > Workflows. Alias will launch the application in the same workflow that was active when you last exited the application.
Choosing the Paint workflow when Alias launches has the same effect as choosing Preferences > Workflow > Paint from the interface. It customizes palette, menus, shelves, marking menus, and control panel for a 2D (sketching) workflow. You can customize these further if you want, as described below).
The Paint mode also changes
the behavior of File > New to behave like Canvas > New Canvas  , creating a new canvas plane
within its own Paint window
, creating a new canvas plane
within its own Paint window
See The Paint window section for more information.
Customize your Alias workspace and environment
Simplify the Alias interface
Customize the tools you see in the Alias interface. For example, to customize the 2D tools,
 .
.
 .
.
This dramatically changes the way the product feels, because you no longer see the functionality you don’t use. The Autodesk Alias defaults should be viewed as a starting point to develop a custom setup.
Use the different short menu sets for different workflow tasks
For example, selecting Preferences > Workflows > Paint switches you to a 2D paint
interface, which removes all modeling, rendering and animation functionality
and changes the default Alias colors to suit working on white
paper. Switching to the paint interface also sets custom 2D marking
menus and shelves.
Customize tool and menu options
Alias supports the ability to create default settings for every tool or menu item; this is very useful functionality if your requirements are different from the shipped defaults.
 .
.
When Automotive is started, it reads this file and sets the defaults described in this file. Some designers like the Alias defaults for brushes; some prefer a different feel and appearance. Take the time to customize the product defaults to suit your own specific style of sketching.
Customize your shelf set to streamline common workflow practices. Painting and sketching is a very artistic occupation, so it’s important to spend the time to customize tools to meet your specific style and workflow.
Save your shelf set with the name User-Default.scm. When this file is present, the shelf set will always be the same when the application starts until you manually re-save this file. If this file is not present, the shelf set is automatically saved with the “last used” shelf settings. Again, some people like the shelf set to be exactly how they last used the product; others prefer to always start with the same shelf each day. You can choose your style of working.
Shelves now have cascading menus and spacers. You can create cascading menus on your shelves by adding tools above other tools. This enables you to create groupings of tools, and better organize your workflow. Cascading menus are indicated by a small yellow arrow. For further information about how to create a tool cascade, see Create a cascade in a shelf.
Spacers enable you to create visual gaps or groupings on the shelf by using non-functional icons that further help you to organize your shelf.
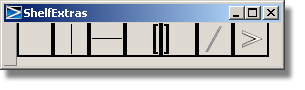
For more information
on using the spacers, see Preferences > Interface > Shelf Extras  .
.
Customize your marking menus to meet your specific workflow. Drag and drop any tool or menu item into the marking menu editor.
Customize your hotkeys
to meet your specific workflow. If you’re a 2D user, you may want
Copy Image to be  +C (Windows)
or
+C (Windows)
or  +C (Mac)
instead of
+C (Mac)
instead of  + + C (Windows)
or + + C (Mac)
, and Paste Image to be + V (Windows)
or + V (Mac)
instead of + + V (Windows)
or + + V (Mac). Hotkeys
can be customized using the hotkey editor.
+ + C (Windows)
or + + C (Mac)
, and Paste Image to be + V (Windows)
or + V (Mac)
instead of + + V (Windows)
or + + V (Mac). Hotkeys
can be customized using the hotkey editor.
The Special:Paint section in the Hotkeys/Menus editor also contains many brush modes, brush parameters (such as radius, opacity, etc) that can be mapped to hotkeys.
In particular, if you use high resolution canvases and want your brushes to keep the same appearance as on standard resolution canvas, you can scale several properties of your brush at once, by using the Size hotkey. By default it is mapped to the letter S. Choose a brush, press the S key, and drag the mouse to scale the Min/Max Radius, and Max Opacity of the brush at once.
The Wacom editor allows
you to send hotkey events to the host application. Buttons 1 to 27
on the tablet can be used to quickly access common functionality
like Canvas > New Canvas by mapping the tablet buttons
to Alias hotkeys.
The Wacom editor enables you to map the stylus switch buttons to left, middle and right mouse buttons. This is very important, because the defaults set by Wacom are not optimal for working with Alias.
If you define a hotkey
(see Preferences > Interface > Hotkeys/Menu Editor ) for Windows
> Control Panel, you can quickly toggle the Paint
Panel on and off. This way, you have the screen aspect ratio suitable
for side view sketches of long objects, like cars, and still have quick
access to the paint tool options.
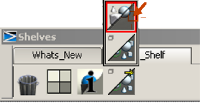
Take advantage of the
Paint Panel shelf tabs. Click with the  on the Shelf
Options menu, to create your own shelves. This gives
you more window real estate by offering a compact alternative to
the main shelf window. You can have and switch between color shelves,
texture brush shelves, pencil shelves, and so on.
on the Shelf
Options menu, to create your own shelves. This gives
you more window real estate by offering a compact alternative to
the main shelf window. You can have and switch between color shelves,
texture brush shelves, pencil shelves, and so on.
See The shelf area for more details.
Try to minimize the number of running applications (for example, don’t run multiple sessions of Alias or have Alias, Photoshop, and Illustrator running at the same time). Automotive, Photoshop and Illustrator are memory and graphics card intensive applications, so be sensitive to this when working with lots of large canvas layers.
If you feel the application is sluggish after working for a while, monitor the memory used in the Task Manager and/or exit/restart Alias periodically and/or reboot the Windows machine.
options, you can set the
width and height in pixels for new canvas planes. Alias has
a preference for default canvas plane resolution (located in the Paint section
of Preferences > General Preferences  ); adjust the values for default
canvas width and height to your specific requirements.Try to limit
your maximum canvas size to 8 million pixels (for example width
= 4000 and height = 2000).
); adjust the values for default
canvas width and height to your specific requirements.Try to limit
your maximum canvas size to 8 million pixels (for example width
= 4000 and height = 2000).
-Spacebar (Windows) key combination
removes all floating windows, which improves brush speed and quality.
. Setting the timer to 0
and using -Spacebar (Windows) to hide
all floating windows provides the best result.
 means a curve can be picked
and be snapped to.
means it cannot be picked
but can be snapped to.
means a curve can be picked
and be snapped to.
means it cannot be picked
but can be snapped to.
 means it cannot be picked
or snapped to.
means it cannot be picked
or snapped to.
 ,
,  , and
, and  snap buttons (to the right
of the prompt line). Learn to use the modifier keys because you
then know the snap state. It’s very easy to use the persistent buttons
then spend time trying to understand why the brush is drawing strange
strokes. Curve snap is computationally expensive,
so use it only when required. Be aware that Alias attempts
to snap to all invisible geometry.
snap buttons (to the right
of the prompt line). Learn to use the modifier keys because you
then know the snap state. It’s very easy to use the persistent buttons
then spend time trying to understand why the brush is drawing strange
strokes. Curve snap is computationally expensive,
so use it only when required. Be aware that Alias attempts
to snap to all invisible geometry.
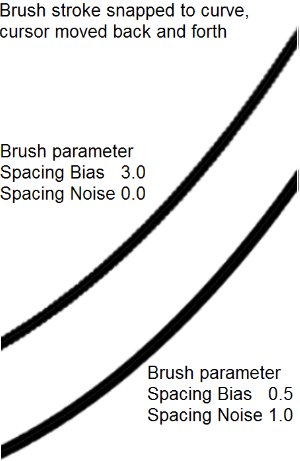
Stroke quality using curve snap
 , then choose Transform > Move
  tool, while image planes
must be picked with Pick > Object Types > Image Plane
tool, while image planes
must be picked with Pick > Object Types > Image Plane  . You then select a Transform tool. From
now on, the system remembers the selection mask, so the transform
tool will always attempt to pick either an object (including canvas
planes) or an image plane.
. You then select a Transform tool. From
now on, the system remembers the selection mask, so the transform
tool will always attempt to pick either an object (including canvas
planes) or an image plane.
See Introduction to canvas and image planesfor the difference between canvas and image planes.
Shapes and multiple curve regions
 or Curve Edit > Curve Section
  to break the curve into
separate segments.
to break the curve into
separate segments.
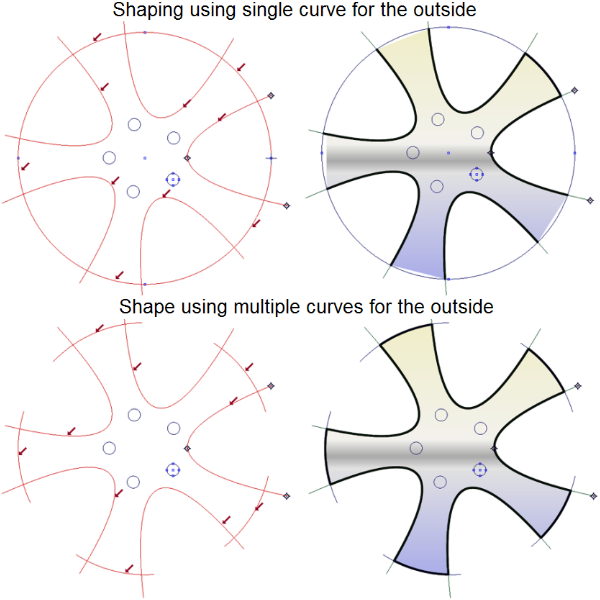
 options to create the copied
geometry as instances. This will duplicate the curve as an instance,
which means when you edit the original curve the instances will
automatically reflect the design change. In this example, only one
point on the original curve is moved; this automatically updates
the other duplicated curves, which in turn automatically updates the
shape object and the shape mask.
options to create the copied
geometry as instances. This will duplicate the curve as an instance,
which means when you edit the original curve the instances will
automatically reflect the design change. In this example, only one
point on the original curve is moved; this automatically updates
the other duplicated curves, which in turn automatically updates the
shape object and the shape mask.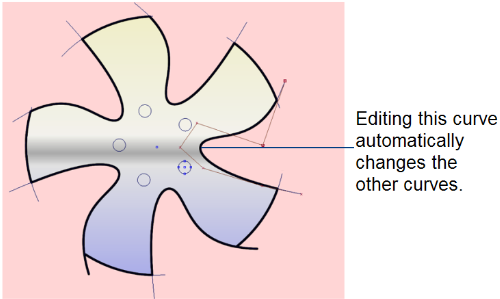
Convenient curve editing tools in Paint mode are:
CVs are turned on when you click on a curve after choosing the Move CV tool. See Control Panel > Move CV.
See Make curves intersect for details on using these two tools.
All of these tools can be accessed from the Shelf.
 with the Type option set
to Connect. When creating shapes
(image, mask or invisibility mask) the software internally joins
the curves.
with the Type option set
to Connect. When creating shapes
(image, mask or invisibility mask) the software internally joins
the curves.
Curve and surface fitting tolerances
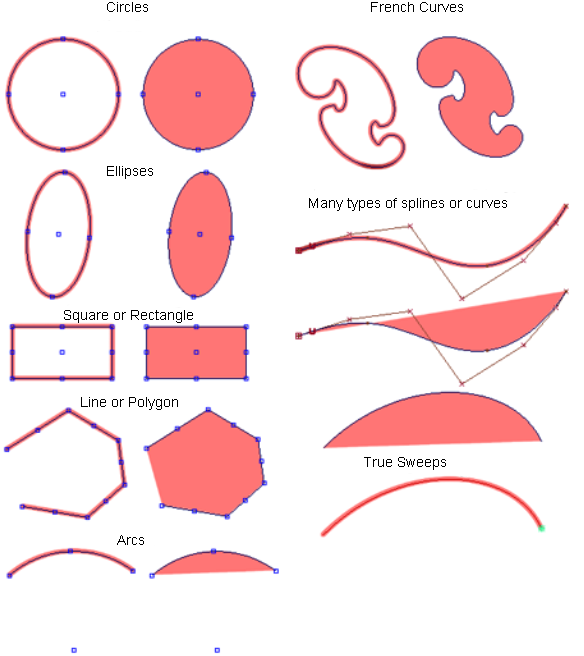
Fast shape and mask creation tools
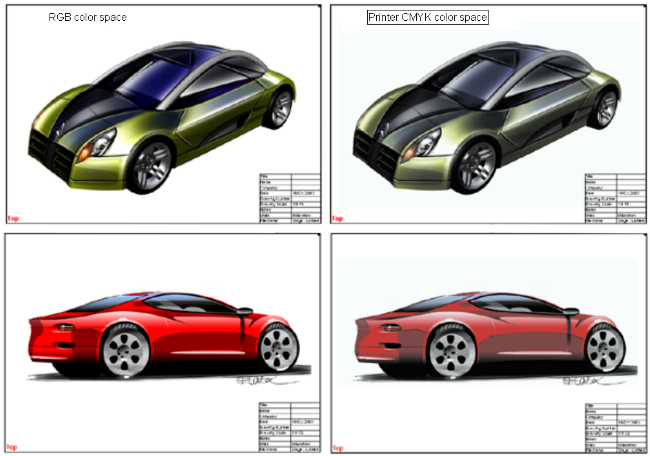
Printer color space versus RGB color space
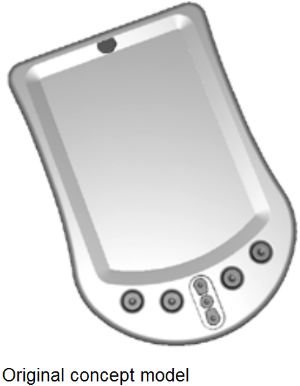
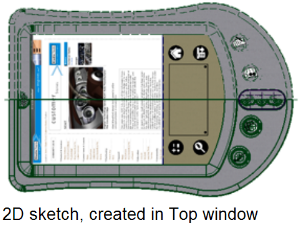
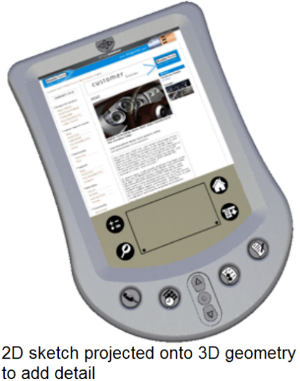
Add design detail to 3D models quickly
See the section Project a sketch to quickly add design details for more information.